Thursday, July 4, 2013

StuG III (Fl): Paint At Last!

Finally got the opportunity to do some initial painting on my Fl. This was my first experience with trying the modulation technique. Let's just say I learned some valuable lessons for "next time"!

Next up are decaling (not many on this beast), tow cables, antennae, and then painting the wheels, tracks, and on-board equipment. Then the final weathering and basing which will finish up this project.

Here's a shot of the Fl as it sits right now. For more pictures please see my build log on Tanks and Things, http://tanksandthings.niceboard.org/t5314p30-stug-iii-f1-mark-groth


Friday, May 31, 2013

KV-2 Finished (For Now)


Well, I made it under the wire for the May Braille Scale build on Tanks and Things. Still some little things to correct/do to totally finish it up, but for now, this is it. I need to clean up some paint wear on the turret roof, fix the grime on the front of the hull, add some graphite to parts of the tracks and MGs, and finish the headlight lens. Oh, and maybe add it to a scenic base.

For more photos you can check out my build log here: http://tanksandthings.niceboard.org/t5559p15-trumpeter-kv-2

Now back to the paint booth for my StuGs!

Thursday, May 23, 2013

Finnish StuG III Ausf.G

Arrrrgh, just realized that I haven't posted ANY updates on my Finnish StuG III and it's ready for painting. To see in-progress photos please jump to my postings on the Tanks and Things forum, http://tanksandthings.niceboard.org/t5315-stug-iii-ausfg-finnish-army-mark-groth

Here's a shot of where it stands right now:
 
The logs are not yet attached, they're simply leaning against the hull for illustrative purposes.

KV-2 Update

Here are some update photos of my KV-2. More details can be found on my posts on the Tanks and Things forum: http://tanksandthings.niceboard.org/t5559p15-trumpeter-kv-2#60371

The turret showing the grab handles I fabricated to replace the molded blobs:

Lower hull with the road wheels, return rollers, drive sprockets, and idler wheels attached:

The completed model:

Primer coat sprayed:

Fading finished:
 
Next up: adding the decals to the turret, painting the tracks, MGs, and tow cables, and final weathering.

Friday, May 3, 2013

Trumpeter KV-2


The Tanks and Things website is hosting a 72nd-scale quick build during the month of May. My build is going to be the Trumpeter KV-2 M1940 Russian "big box". The parts count is fairly low and the only additional work I intend to do at this point is to replace the blobby grab handles with wire and perhaps replace the tow cables.

Here's a shot of my initial work building the assorted wheels and sprockets:

StuG III (Fl) - Almost Ready for Paint

All that's left to add are the tow cables and antennae. Tow cables will be added after decaling and antennae at the very end. Enjoy!


Friday, April 26, 2013

StuG III (Fl) - Recent Progress


I've made some further progress on my Fl, having added the fenders, tracks, and cleaned up the flamethrower and sight covers.

For more details and another pic, please go to Tanks and Things: http://tanksandthings.niceboard.org/t5314p30-stug-iii-f1-mark-groth

Friday, February 22, 2013

StuG III (Fl) - Mantlet Cover Issue


The above photo shows my recent work scratch-building the mantlet cover and a plate to cover the empty gun sight slit. Note that the edges are unfinished on both pending the question of whether or not to add weld beads. Background and more photos are here in my build log: http://tanksandthings.niceboard.org/t5314p15-stug-iii-f1-mark-groth

Thursday, February 21, 2013

StuG III (Fl) - Construction to Date


I've been trying to decide how to best bring this project up-to-date in this blog since construction was started back in early November and since I am maintaining a complete build log on another forum. So I've decided to simply post a link and short description here whenever I update the other site.

If you'll click on the link immediately below, you can follow my work on the lower hull and some of the superstructure. I also ran into research issues concerning the front plate and gun sight opening.

http://tanksandthings.niceboard.org/t5314-stug-iii-f1-mark-groth

Wednesday, February 13, 2013

It's StuG-tastic!

As I referenced in a previous post, I decided to join the "Simply StuGs" group build on the "Jenny's Tanks & Things" web forum. (If you've never checked it out, do yourself a favor and do so . . . some great builds and a friendly group of folks: http://tanksandthings.niceboard.org/  The build started on November 1 and runs through October 2013 so even I should be able to complete my models.

Yep, that was plural. I initially decided to build Tamiya's StuG III Ausf.G "Finnish Army" but after opening the box I discovered that no mesh was included for the various grills and that the main gun barrel was Tamiya's usual two-piece, split-down-the-middle, affair. So I went in search of another StuG and stumbled across Cyber-Hobby's StuG III (Fl), the unusual flame thrower version. Soon after, I found a vendor with the needed grills in stock for the Ausf.G and another with the appropriate metal barrel so I thought, "What the hell," I'll just build them both. I've been working on both of these models since November so my build logs will contain a lot of "catch-up."


StuG III (Fl)
Flammpanzer German Flamethrowers, 1941-45, Tom Jentz and Hilary Doyle, Osprey New Vanguard No. 15, 1995, pg. 24.
It was decided in late 1942 to outfit a series of ten StuG IIIs with flamethrowers. The initial decision was to convert ten new StuGs from the current production series, but this was scrubbed in favor of assembling them from rebuilt chassis from older StuGs that had been returned to the ordnance depot for major repairs and overhauls. The ten rebuilt Flamms were issued to Panzertruppenschule I and were shipped by rail to this unit on 29 June 1943. One of the ten subsequently caught fire and burned out in July 1943. It was repaired and resumed service with the unit in September 1943. No records have been found indicating that any of these ten Flamms were ever used in combat. All ten were returned to the ordnance depot in January 1944 and were eventually converted back to normal StuGs mounting the 7.5cm Sturmkanone 40 L/48.
 
The photo above is the only known photo of one of these vehicles. The lack of discernible information in this photo led to some decisions needing to be made regarding this build.
 
StuG III Ausf.G Finnish Army


The Finnish Army's armored division was formed in 1942 and included an Assault Gun Battalion. In the spring of 1943, they purchased thirty StuG IIIs to re-equip the battalion. The first units arrived at the unit's base at Petrozavodsk on September 2, 1943. It soon became apparent that no other Finnish AFVs could match the StuGs and twenty-nine more were ordered and delivered in mid-1944.

Finland's StuGs were the Ausf.G variant. Changes made by Finland in Spring 1944 included: removal of the Schurzen, addition of a wooden tool box, replacement of the MG34s with DT machine guns, and mounting the spare wheels on the vehicle sides. Beginning in July 1944, the Finns added: logs to the vehicle sides, concrete to the front of the superstructure, spare track links to the front of the hull, a visored driver's vision port, bolt-on armor to the hull sides, and a deflection plate to the mantlet.

Tuesday, January 29, 2013

Sd.Kfz.261 - Construction I.

In yesterday's post, I neglected to point out the marking options for this kit. Two are illustrated in the instructions: one from an unidentified unit and one from the 2nd Panzer Division, both 1941, and both in panzer grey. The 2nd Pz. Div. vehicle has the "do it yourself" registration numbers where a blank white decal is included along with individual black numbers so you can theoretically assign any number. In this scale, no thanks!

On to construction. Steps 1 and 2 cover the suspension and under-carriage and the attachment of various components to the lower hull. Step 3 covers the mesh "turret", the attachment of items to the upper hull, and the joining of the upper and lower halves. Four indentations need to be filled with putty as this upper hull molding was used for one of the prior versions of this armored car kit.

At this point, I have not attached the mufflers or rear tow hooks and the wheels/tires have been left off for ease of painting. A shot of the underside:


And a shot of the left side. Note the filled indentations used for a previous kit and the heaviness of the mesh in the turret. The equipment has not been added to the rear fenders and the front fenders are added in a later step.

Monday, January 28, 2013

A Small Diversion


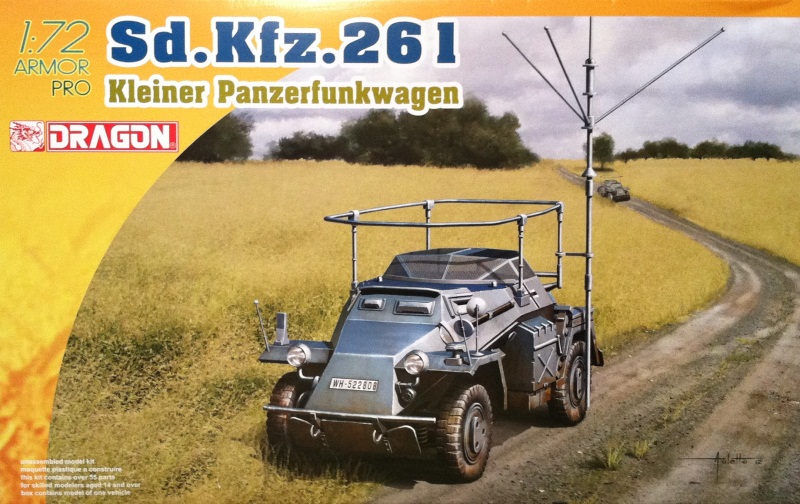
Before diving back into my larger projects, I thought that I'd tackle Dragon's recent 72nd scale kit, the Sd.Kfz.261 Kleiner Panzerfunkwagen.

Following the 221, 222, and 223, the 260 and 261 were the fourth and fifth types of armored cars built on the "standard chassis for heavy passenger cars." They had four-wheel drive and armor designed to protect against AP bullets. The screens on top were intended to keep out hand grenades.

The 260 and 261 had no mounted armament. Instead, they were outfitted with long-range radio sets. The 260's radio sets operated in the same frequency band as those used in aircraft. The 261's were high-powered radio sets used for long-range communication with other headquarters.

A total of 483 Sd.Kfz.260s and 261s were completed between April 1941 and April 1943.

The kit itself is molded in Dragon's usual grey styrene. This kit only includes one vehicle whereas Dragon's previous offerings in this series included two. Given that, I expected something special in the kit . . . perhaps some nice PE or added details. Not only is there no PE, but the screens are rather heavily molded in plastic. I guess Dragon figured that since nothing could be seen through the screens that it wasn't necessary to include them in PE. Oh, well. From what I can tell, the kit does include new front fenders and has what appears to be a rather nice mast antenna. All in all, the molding appears to be finely done with little to no flash.

To give you some idea as to the size of this vehicle, here's a photo of both the lower and upper hull with a U.S. quarter:


On to construction!

Thursday, January 10, 2013

Renault UE: Construction


The holidays are over, so I guess it's time to play catch-up with posting the progress on some of my projects.

First up is the Renault UE that I built while at the beach in September. It's a 2007 Tamiya kit produced in 1/35th scale. Injection-molded in dark green styrene, it provides the option for building one of three variants: Series 2, 3, or 4. All are marked as "Unit Unknown, France, 1940." Parts are included for the UE itself as well as the towed, tracked trailer. Tracks are link and length and it truly is a "diorama in a box" as it includes four figures (two interior crew and two standing) as well as a sprue containing barrels, boxes, tarps, and other equipment with which to fill the rear cargo bin and trailer.

The first three steps cover construction of the hull and are straightforward. As one would expect from Tamiya, fit is excellent, even for a five-year-old kit. Following are two pictures of the hull at this point:


Steps 4-7 cover construction of the wheels, suspension, drive sprockets and the attachment of the tracks. This was my first real experience with link and length tracks of this size (small!) and things went without a hitch. Tamiya  has captured the track sag on both the UE and the trailer very well. Here's a picture of the unassembled wheels and suspension:


 Steps 8-11 cover the addition of various hull parts and the hatches. It's important to pay attention to the instructions at this point as it is here that the choice of attachments will determine which of the three versions you end up with. I left the hatches unglued at this point so that I could paint and insert the crew figures at a later time. The only thing extra I needed to do here was drill out the exhaust pipe.

Step 12-13 detail the construction and attachment of the cargo deck. Two pictures showing the completed UE:


Last up was the construction of the trailer, covered in Steps 15-17. Link and length tracks are again used and again went together with a minimum of fuss:


And here's a photo of the complete build at this point:


All that's left is to choose the cargo, paint and weather the UE and trailer, build and paint the figures, and decide on a setting and base for the display.

Friday, November 2, 2012

Renault UE: The Real Deal


As the French army underwent mechanization in the 1920s, the need arose for a small, tracked armored vehicle capable of transporting supplies and weapons to the front lines and towing light artillery. In October 1930, Renault's armored carrier UE was chosen by the French army from several competing designs and production of the first 60 operational vehicles was completed by September 1932.

At 2.8m long, 1.74m wide, and 2.6 tons fully loaded, it was a sturdy, compact design that featured a riveted joint hull construction and a reliable suspension with garter beams supporting the road wheels. The two-member driver/navigator crew was housed in a central compartment, but since their heads protruded from the chassis, special domed-shaped hatches were mounted to augment the carrier's 9mm armor and protect against small-arms fire and shrapnel. A 38hp gasoline engine enabled a road speed of 30km/hr, while over 1 ton of cargo could be carried on the tiltable rear deck and towed trailer. Approximately 4,900 armored carrier UEs were produced until June 1940, including the UE2 variant which featured 4-speed transmission instead of 3-speed, and tow shackles in place of the pig-tailed hooks.

When France capitulated to Germany in June 1940, approximately 3,000 captured armored carrier UEs were pressed into service with German forces, which used them as transports, artillery and aircraft towing vehicles, and as modified self-propelled guns.

--Source: Tamiya

Beach Build Sept. 2012: Renault Armored Carrier UE


Before heading to the beach, I rummaged through my stash looking for a kit that I could conceivably complete during the week, that would lend itself to varying modeling times, and that would require a minimum of tools. Ideally, I would be able to return home with construction completed and could proceed straight to painting and finishing. The kit I decided on was Tamiya's 1/35th scale French Armored Carrier UE.

As soon as we checked into the house I began scouting for a suitable workspace. I immediately spied an out-of-the-way table with a view of the beach and not far from the fridge!

Projects and More Projects

It's been some time since I posted, but not a whole lot has been built during that time. I've begun several new projects to add to my "in progress" list so I thought it might be good to summarize where I stand on all of them.

Stug III (F1) and Finnish Army Stug III Ausf. G (New)
These are both in the initial stages of construction. I'm building them for an online build for the "Tanks and Things" forum. I'll get separate postings done for each soon.

Marder II (New)
I saw this kit at HobbyTown and bought in on a whim. Ordered an after-market barrel and other goodies for it and dove right in. I'm currently constructing the gun. Post coming soon.

French Armored Carrier UE (New)
Rescued this kit from my stash and took it to the beach with me back in September. I completed construction on it and its trailer at the beach and it's now ready for the paint booth. I'll post photos soon.

T-34/76 Model 1941 (35th Scale)
I'm noodling over the attachment of the ice cleats to the fenders--how many groups to attach and which ones. These involve fiddly PE straps and buckles. Also, I'm still worrying over the square fuel tanks for the rear deck.

Steyr 1500A/01
The wiring of all the radios and electrical gear is proving to be quite a hurdle to get over. 'Nuff said about that.

Kfz.13
I'm back to the suspension with all it's PE and small plastic bits. Then all that's left is setting up the MG and adding details.

I think that's it . . . certainly enough to carry me through the winter. Now to get to those four new posts and photos :)

Thursday, September 6, 2012

Kfz.13 - Body Work


It's beginning to look a lot like a Kfz.13!

Since my last post, I've attached the "tub" to the frame along with the front section, armored grill, and the rear fenders.

Next, it's back to the frame, suspension, and the addition of some "goodies" to the tub.

35th Scale T-34: Hull Work


I've made a little progress on the hull. The upper section has been glued to the bottom. Fit was generally good with the only gap being left at the very rear. I'll fill this with a combination of plastic strips of the appropriate width and putty.

As can be seen above, I attached the engine screen housing after airbrushing the inside with Vallejo Russian Green primer. I then attached the rear access hatch, exhausts, and jack blocks/chocks to the rear fenders and extra track links and attachment points to both sides.

I'm still undecided about which auxiliary fuel tanks to use. My initial thought was to go with the Aber PE square fuel tanks on the rear. After seeing how difficult it was going to be to bend them to the proper shape, I decided to go with the kit-supplied rectangular fuel tanks on the sides. Accordingly, I added the jack blocks (or chocks) to both rear fenders. Then I acquired the resin square tanks from Mig USA but, when examining them after they arrived, they look to be too large. So now the PE tanks aren't looking so bad but that means I'll need to remove the jack blocks/chocks from the rear fenders to get the square tanks to properly fit. I guess I won't make the final decision until I get to a step from which I can't easily recover :)

Monday, August 27, 2012

Kfz.13 - Back to the "Tub"


While I'm waiting for my squarish fuel tanks to arrive from Mig USA for my T-34, I thought I'd spend some time on the Kfz.13 armored car I began several months ago. I've added the front and rear body sections to the floor and have constructed the support system and seat for the MG-42. I'm leaving off the machine gun, shield, and doors at this point to facilitate painting the interior.

The photo below illustrates why this car was termed a "bathtub on wheels."

Tuesday, August 21, 2012

72nd Scale T-34: Finished!


I've messed around with the finish on the tank and with the ground work about all that I can, so here are photos of my completed T-34/76 Model 1941, 1st Tank Brigade, Poland, 1945.

While not totally happy with it, I've learned some valuable lessons to apply to future builds. Stay tuned!